How To Use Our Water Test Kits
On the Spot Results in Minutes.
Watersafe home water test kits are so simple that anyone can use them, and most contaminants can be detected in minutes.
Watersafe water test kits are validated by EPA-certified laboratories, vetted by experts in the field, and widely trusted for highly accurate results. Specifically designed to help you test quickly and easily for up for common water quality concerns in one kit for private & well water, including: iron, copper, lead, coliform bacteria, nitrates, nitrites, chlorine, pH and hardness.
Watch our videos to see how they work.
Drinking Water Test Instructions For Use
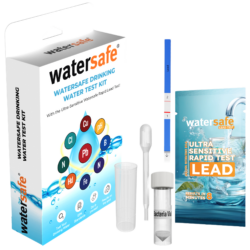
About the Product
Read all instructions before use
This Watersafe® test kit contains everything you need to find out simply and accurately if your water contains unsafe or undesirable levels of nine common contaminants. Follow instructions carefully for each test, and compare results to the Desired Values.
Kit Components
- One Lead Test Packet
- One Bacteria Test Vial
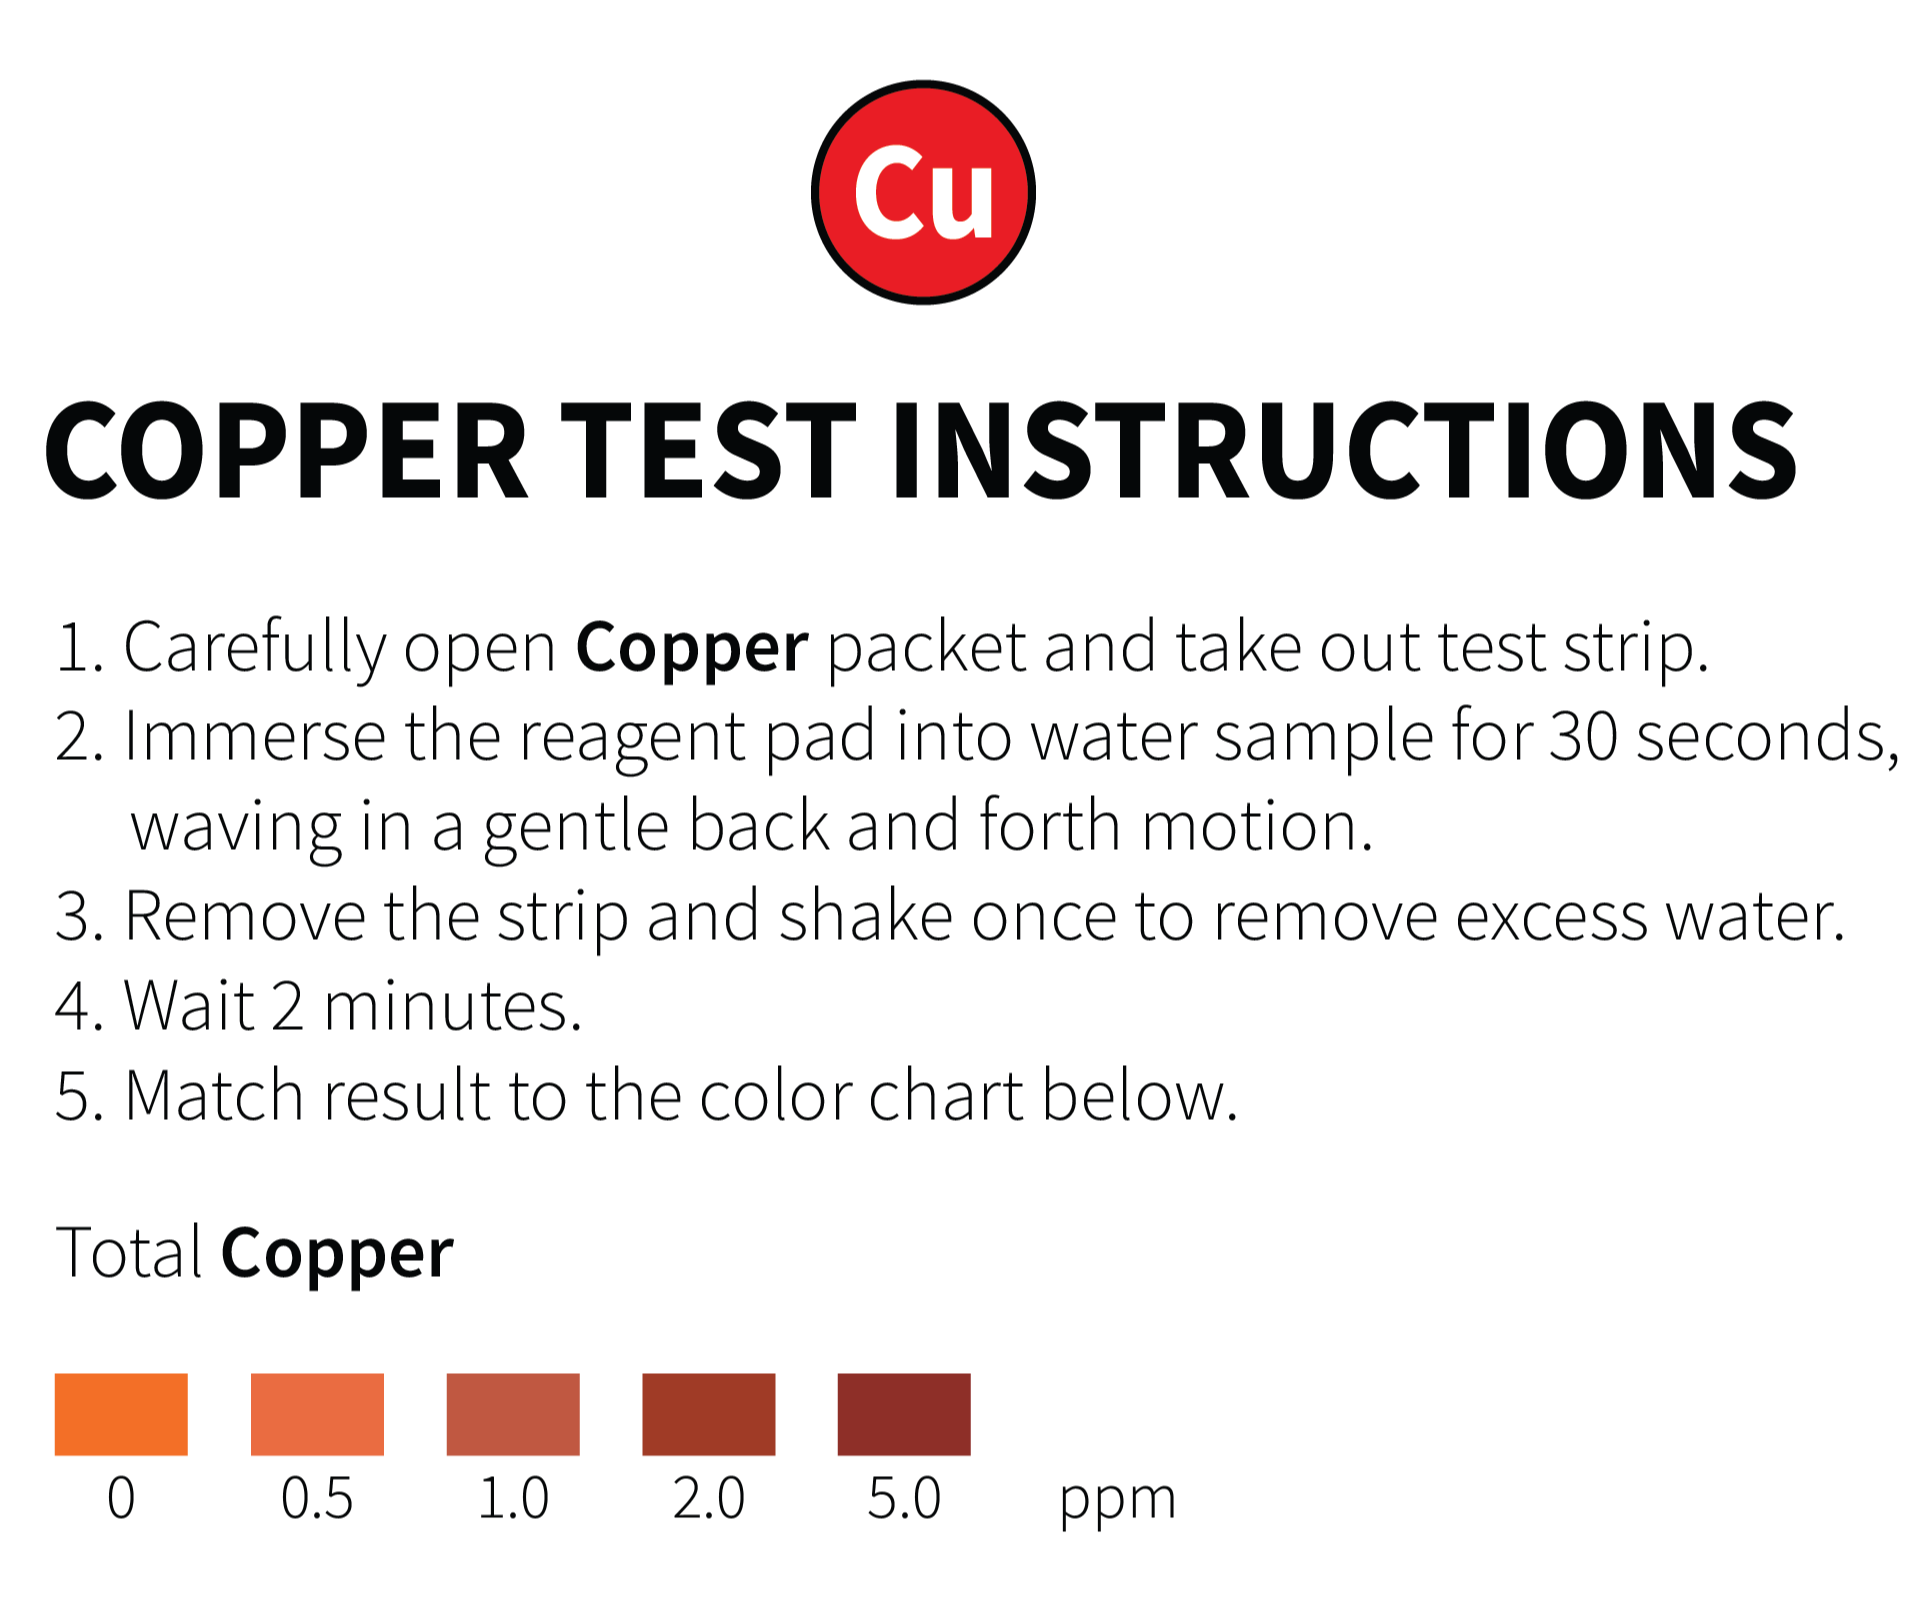
- One Copper Test Packet
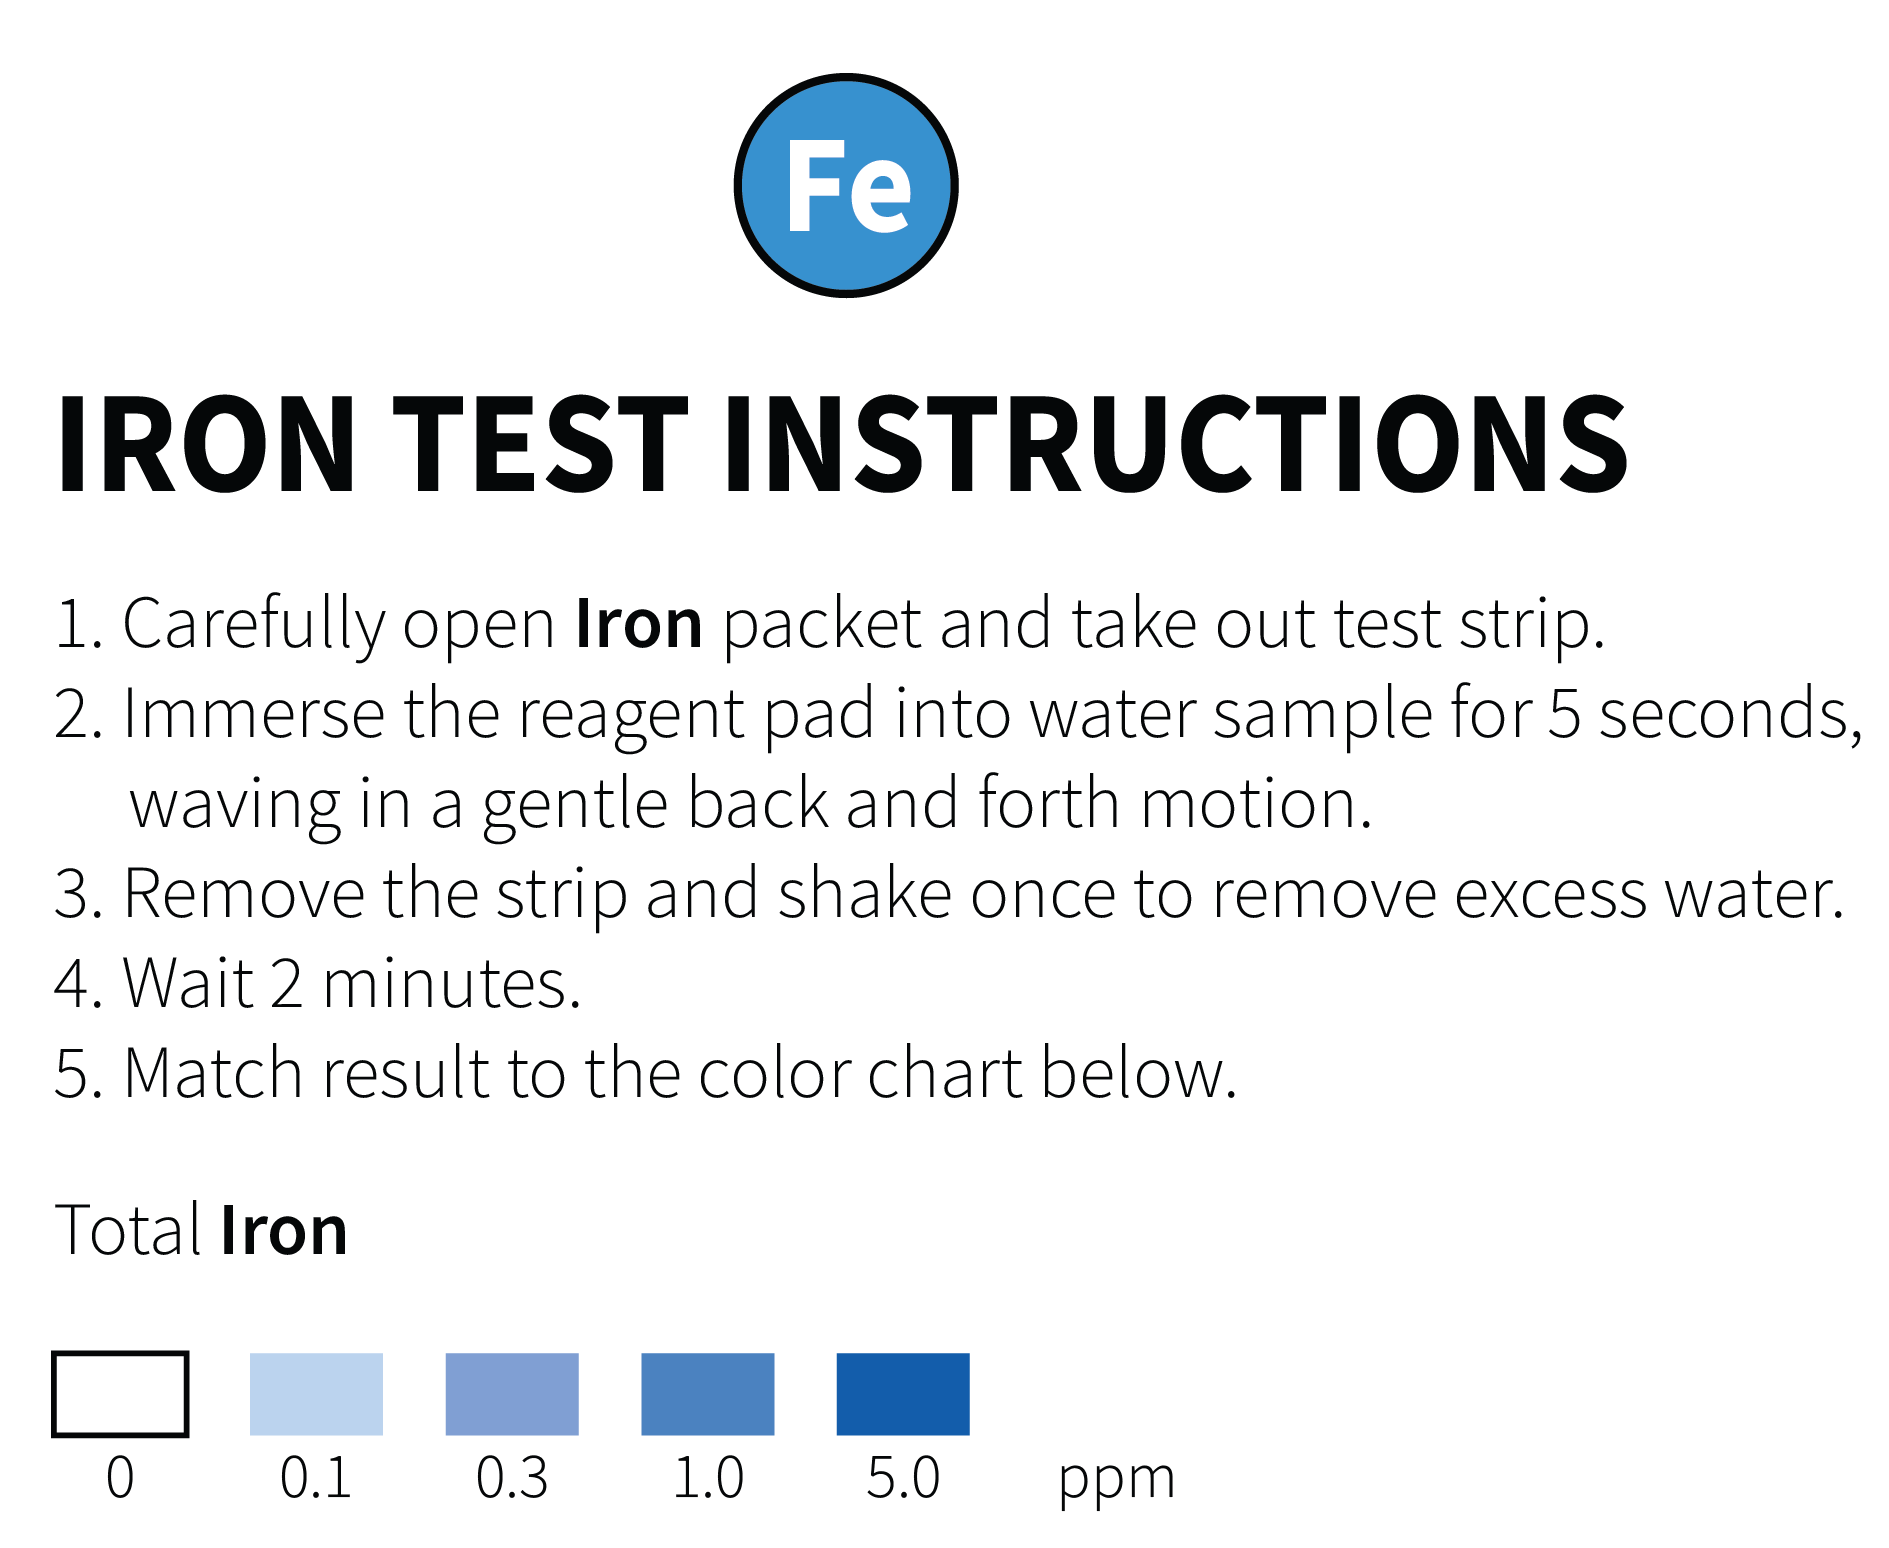
- One Iron Test Packet
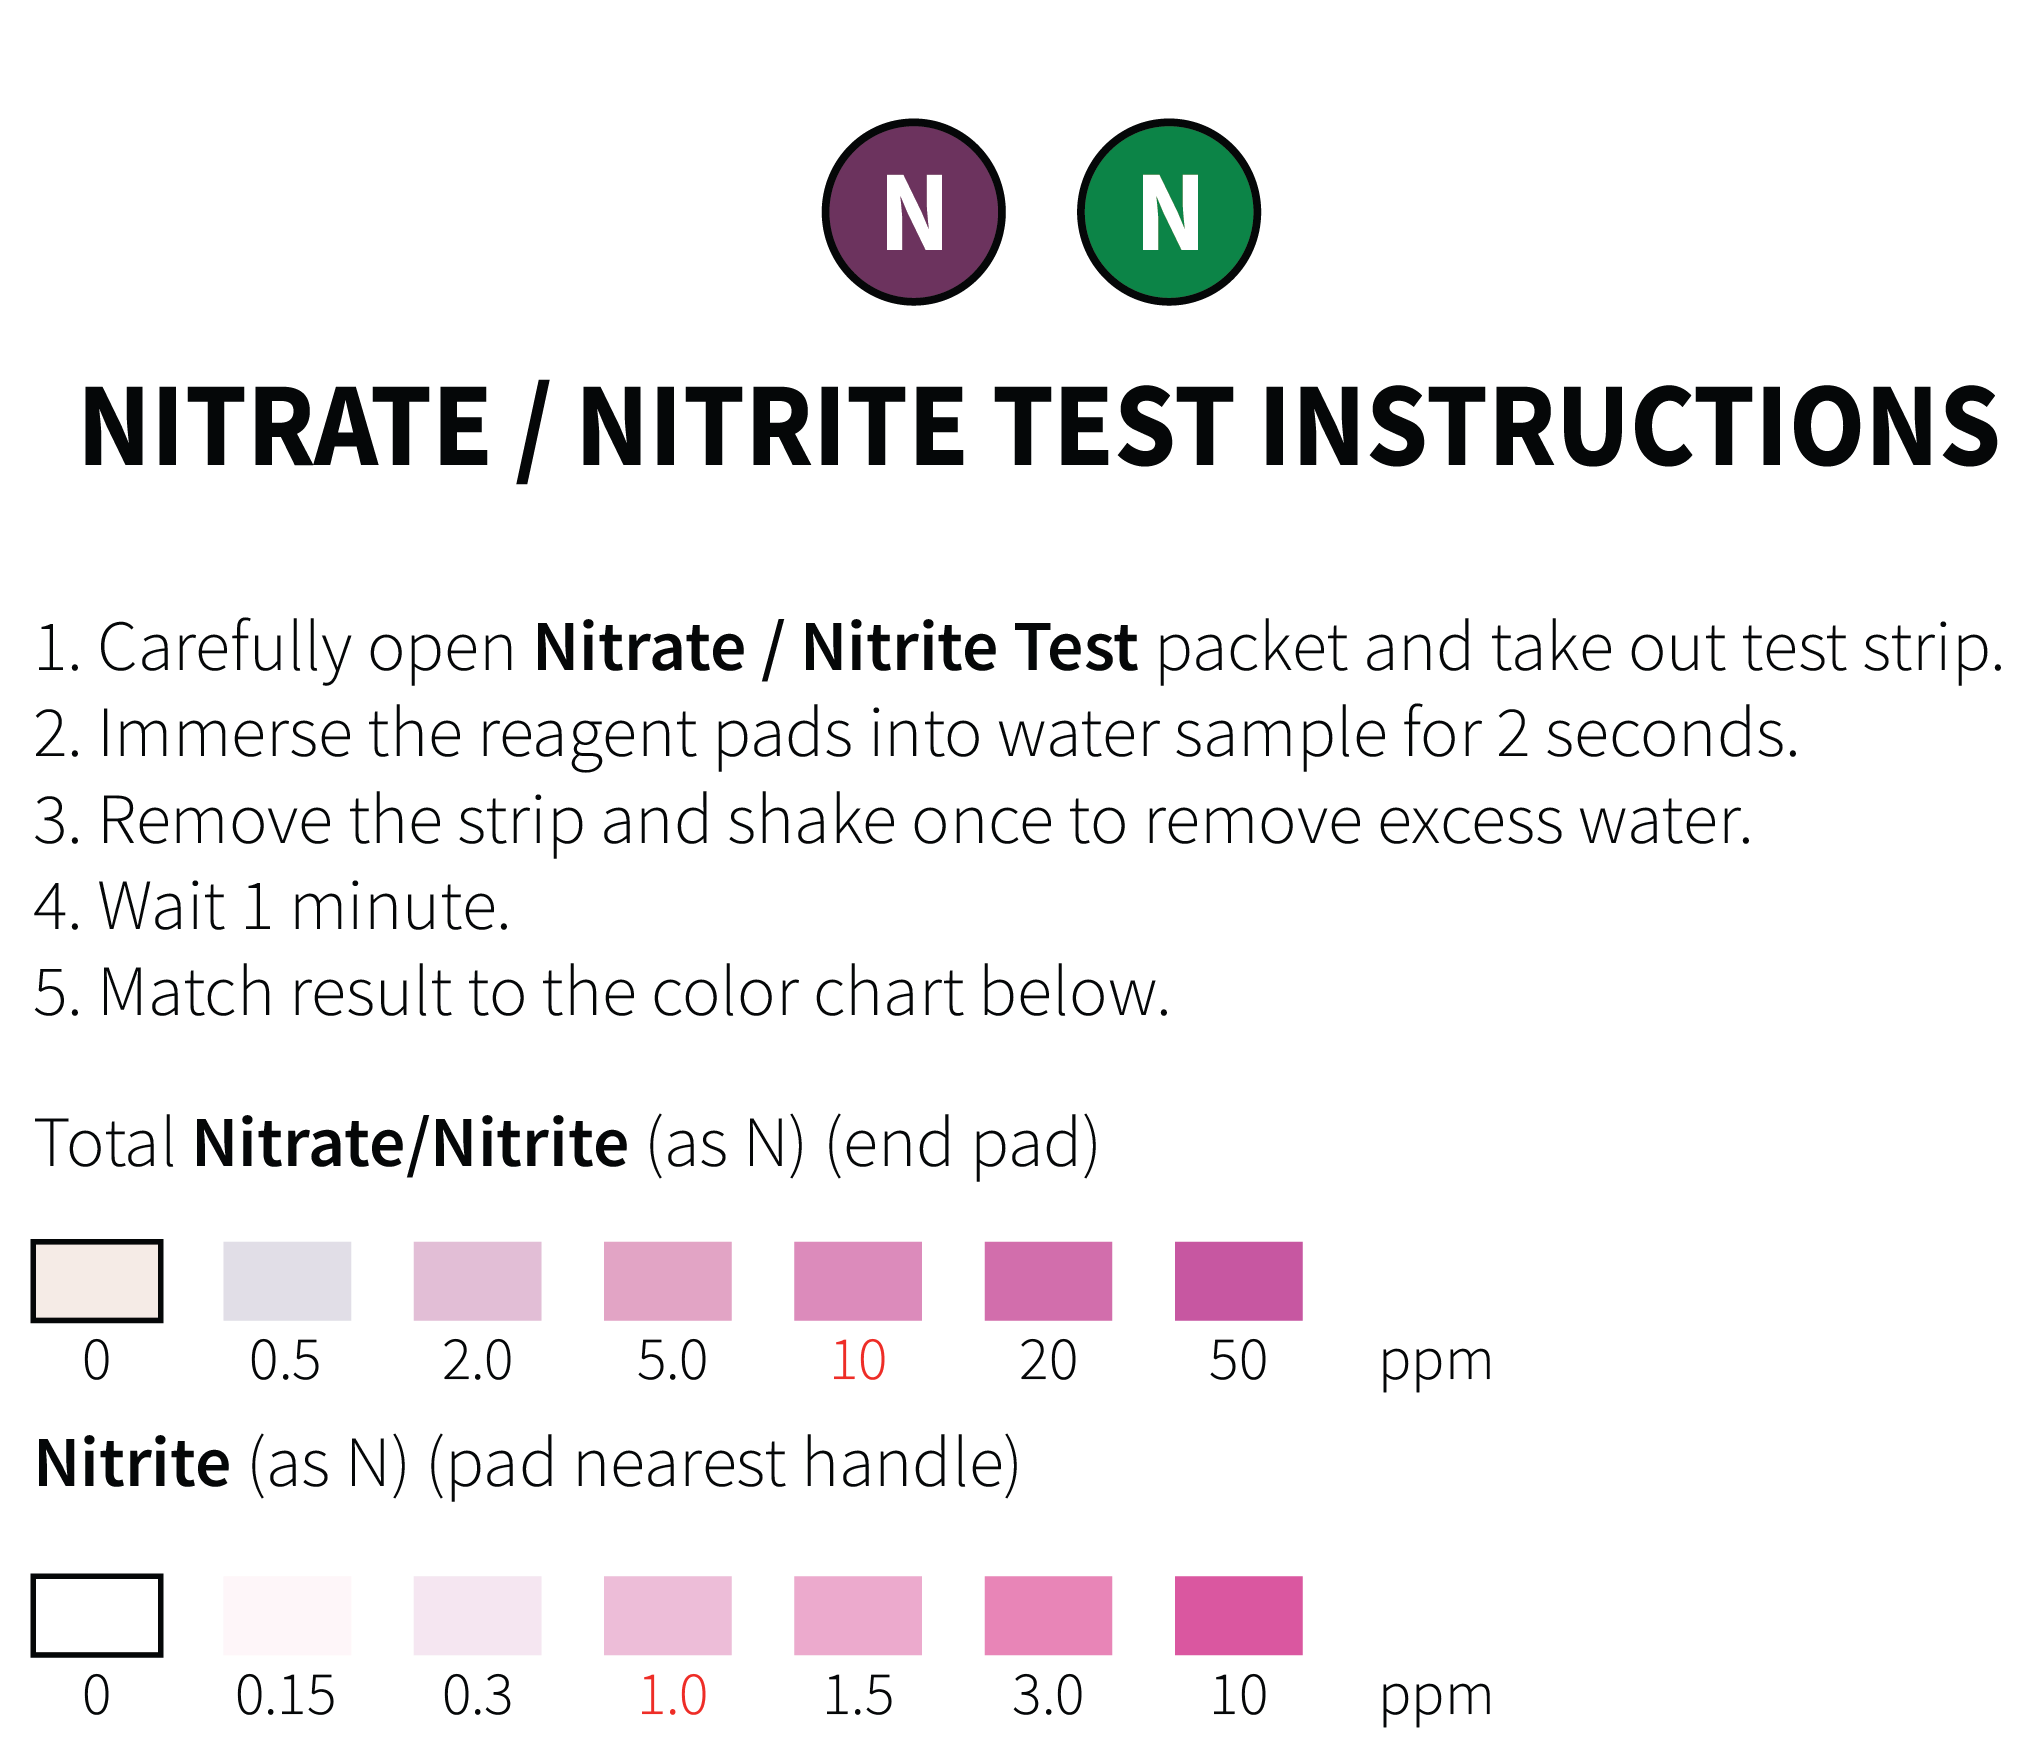
- One Nitrate / Nitrite Test Packet
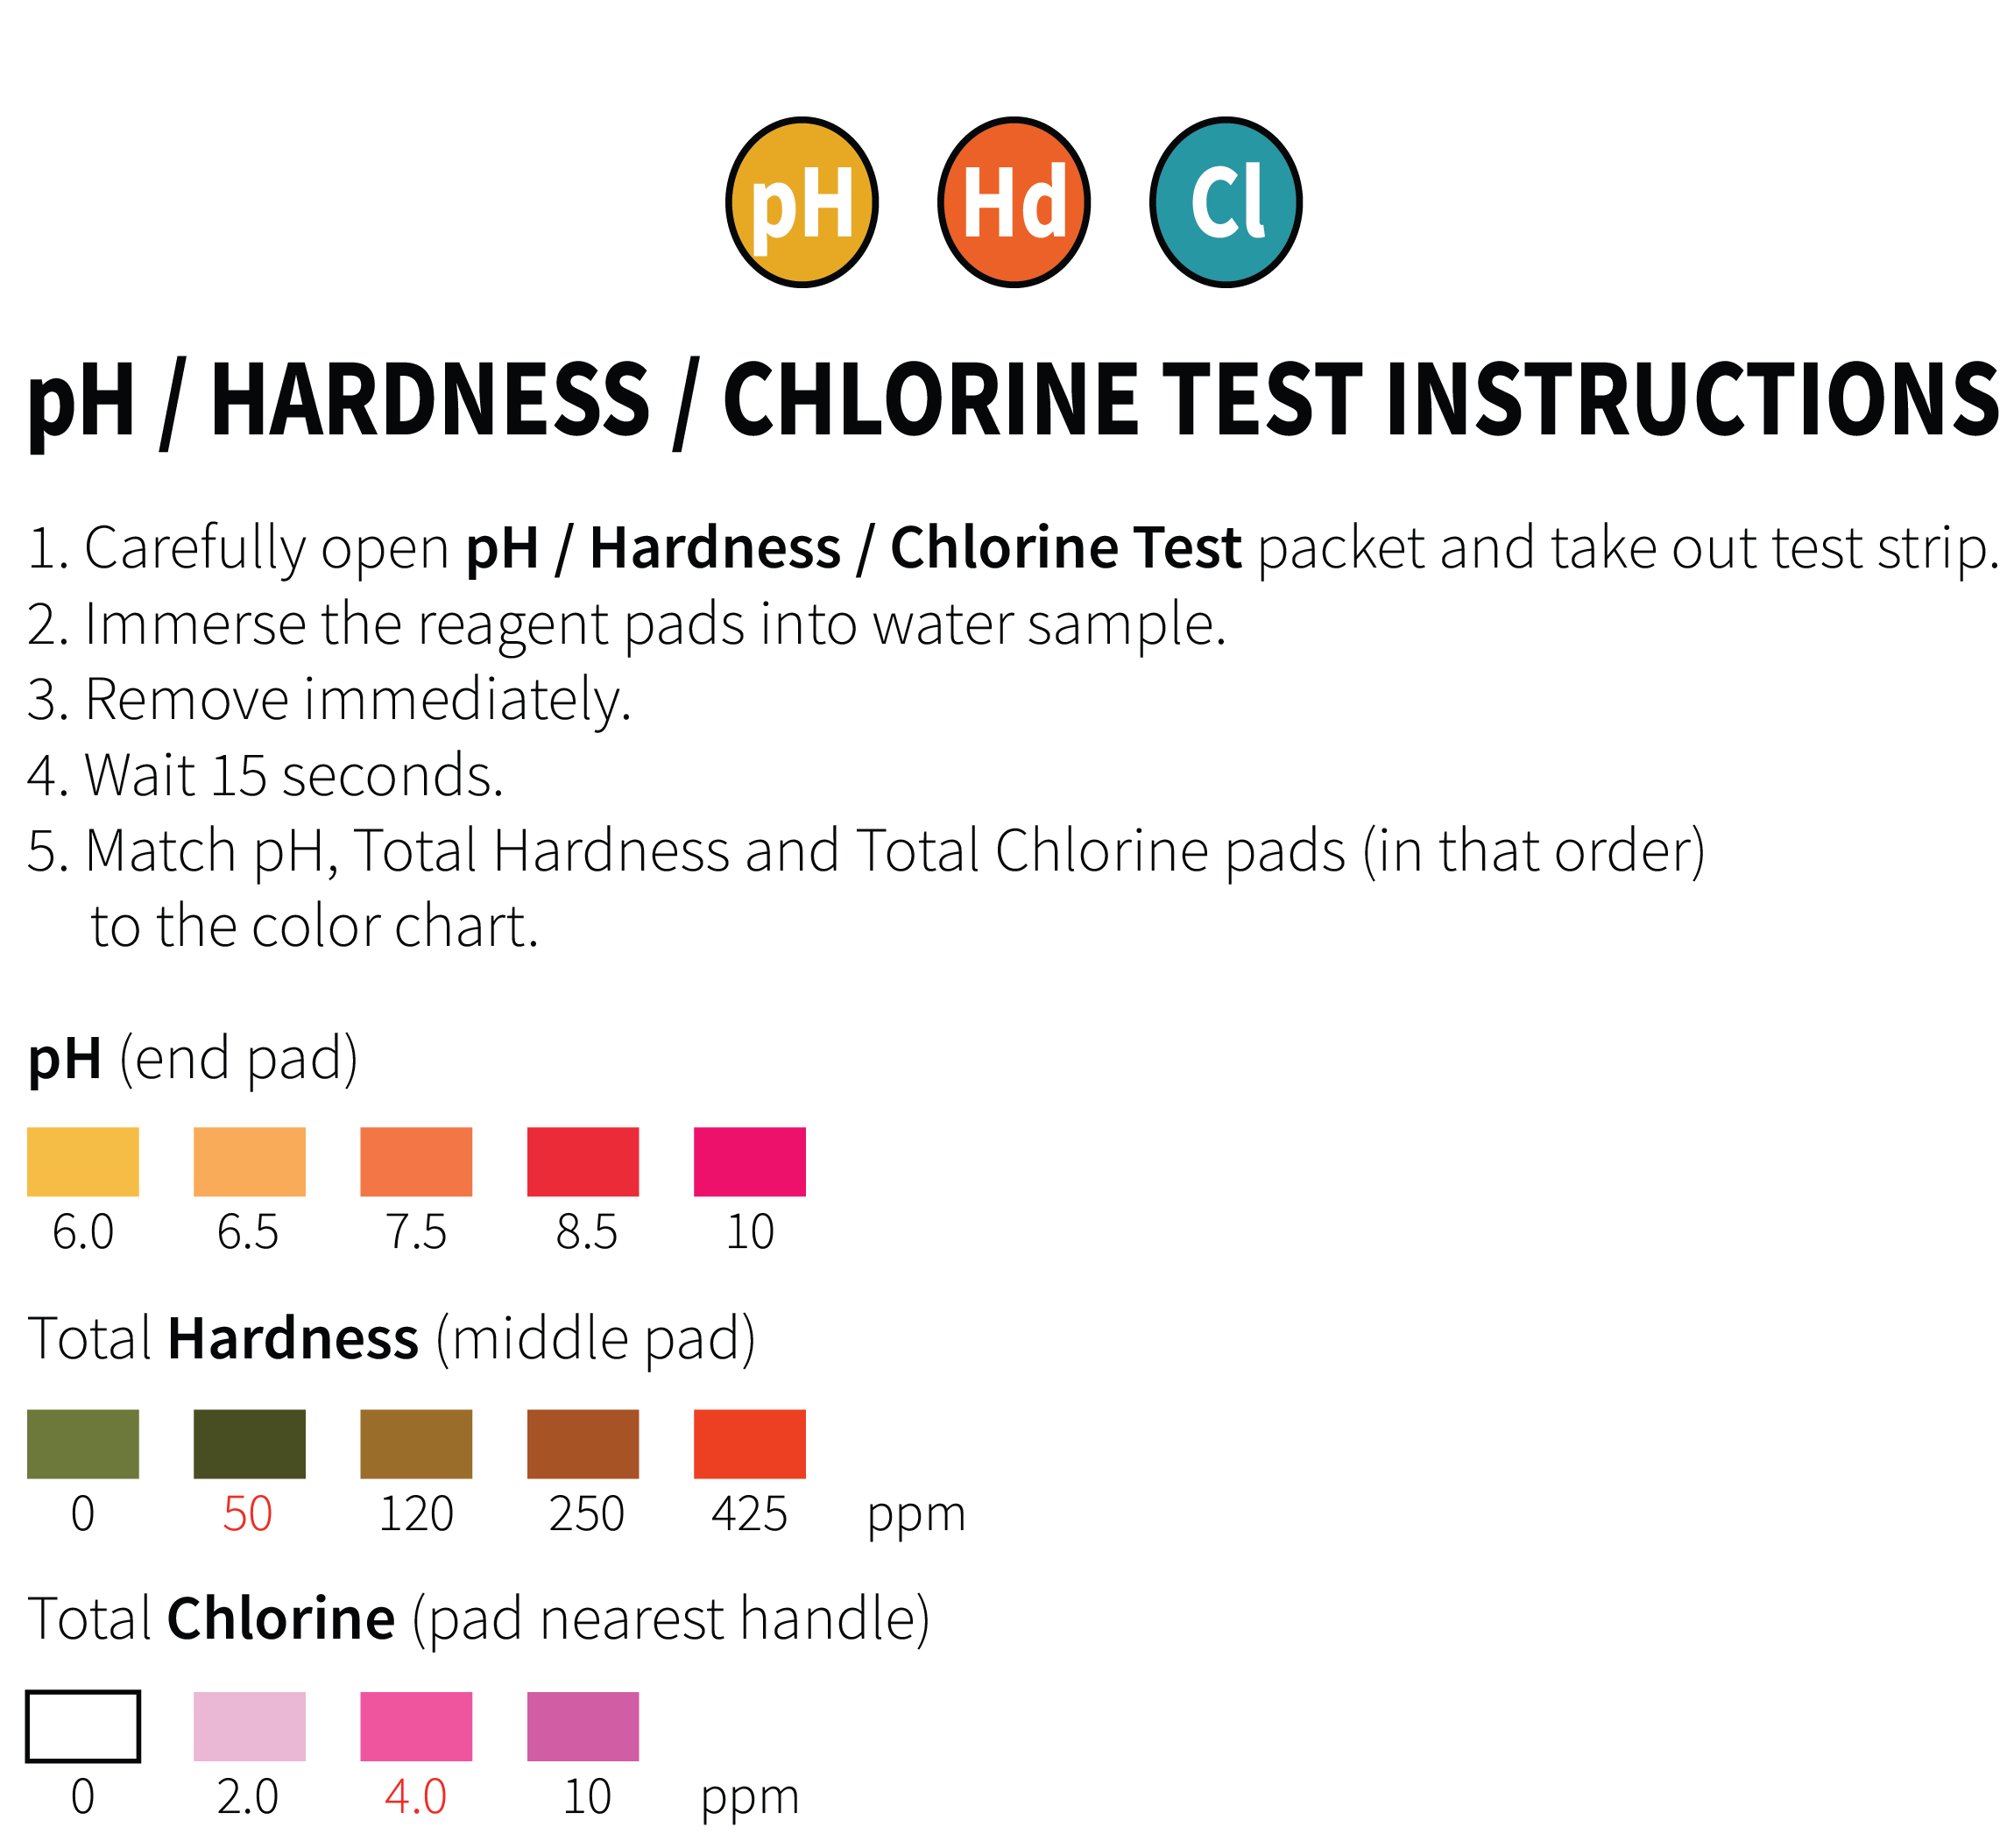
- One pH / Hardness / Chlorine Test Packet
Precautions and Warnings
- Do not open foil pouch prior to use.
- Do not reuse any components of the test kit.
Storage
- Store at room temperature (10-30°C/50-86°F)
- Do not use after expiration date on packaging
Lead Test – Step by Step Instructions
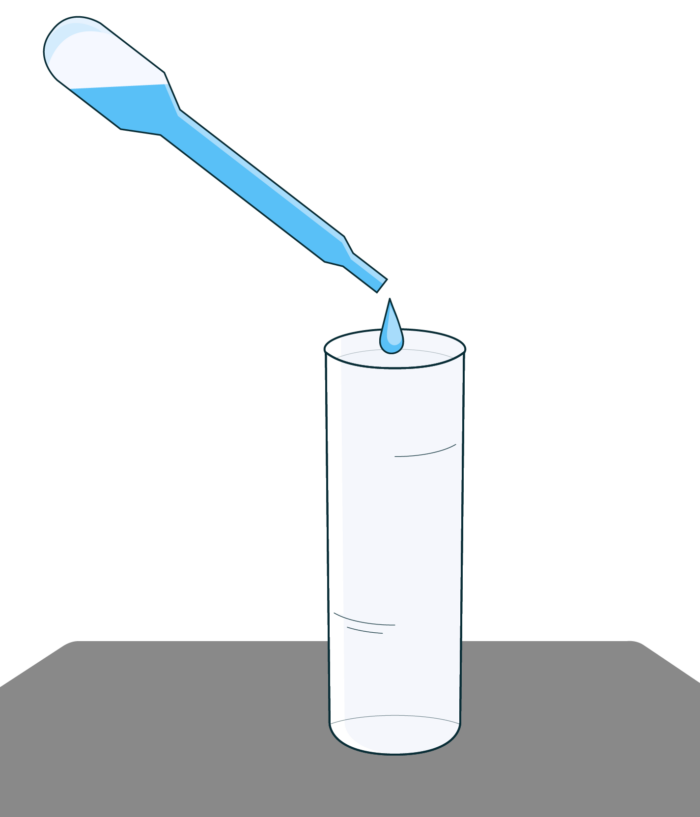
Step # 1
Using the Pipette, add Seven (7) drops of drinking water into the Test Vial.
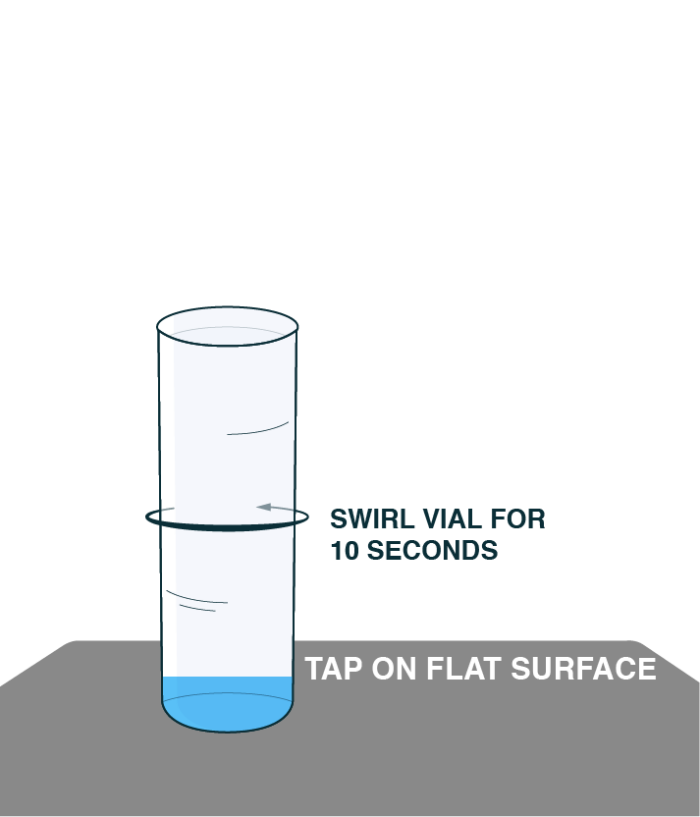
Step # 2
Swirl Test Vial for 10 seconds. Make sure all liquid is at the bottom of the Test Vial by tapping it gently on a flat surface.
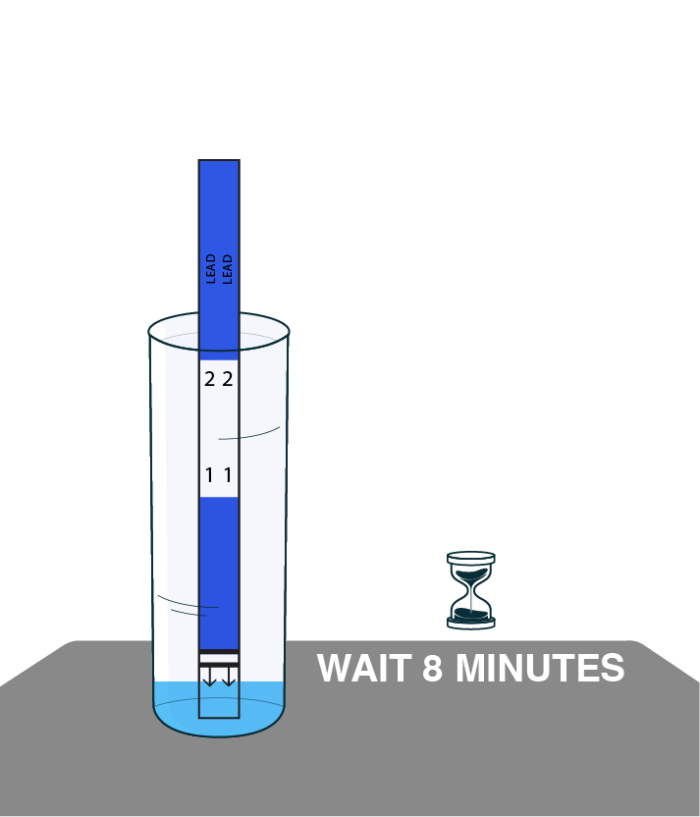
Step # 3
Place Test Strip into the Test Vial with arrows pointing DOWN. Wait 8 MINUTES. Do not disturb the Test Strip or Test Vial during this time.
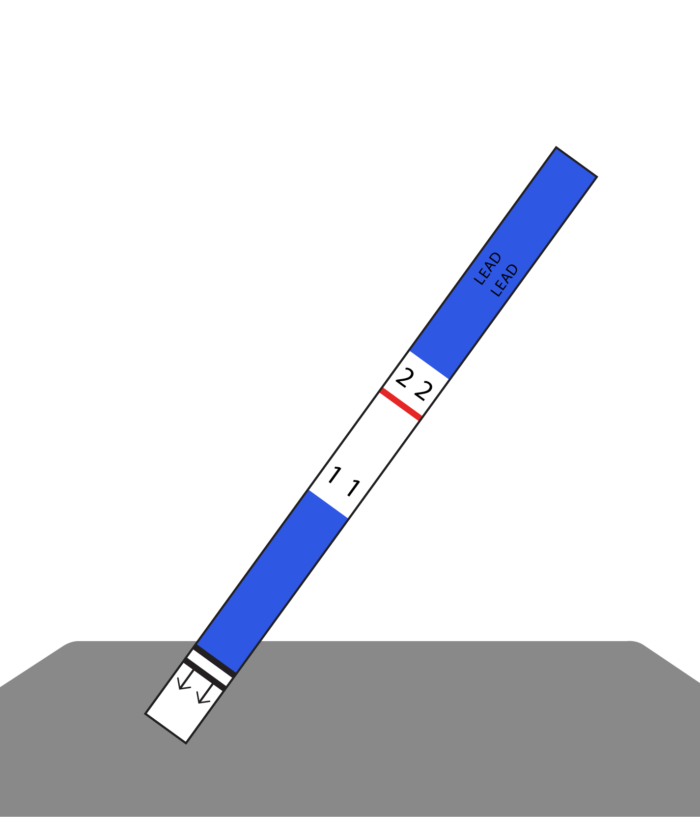
Step # 4
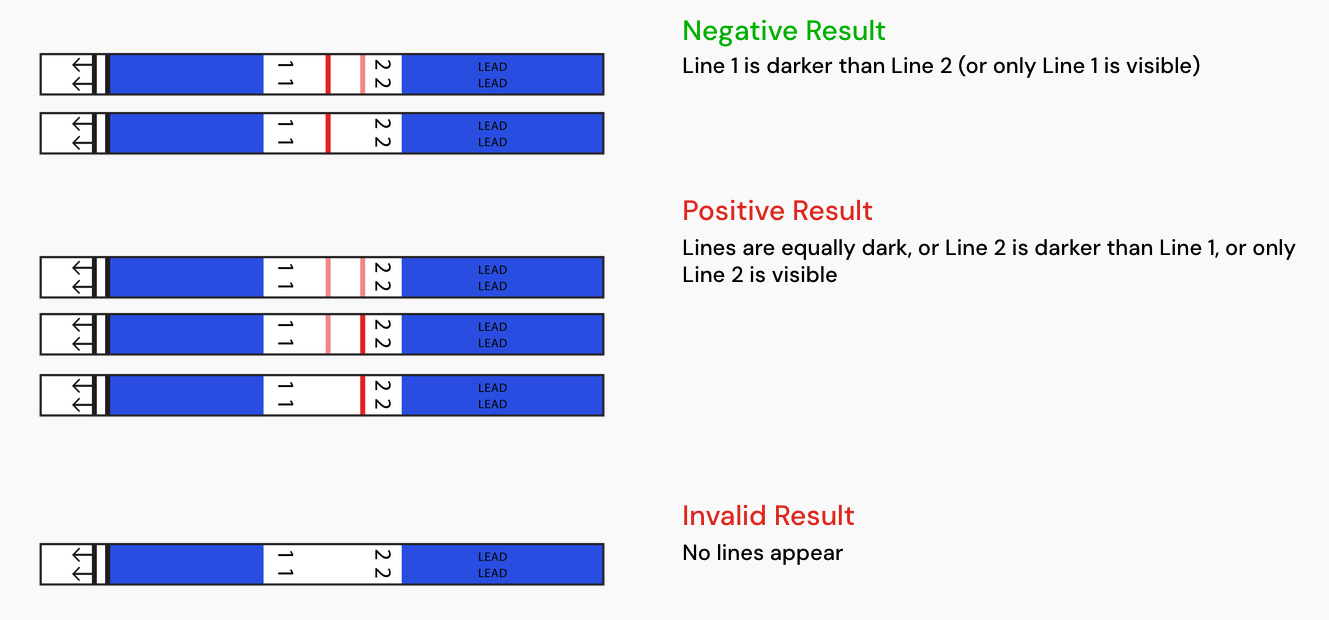
Take Test Strip out of Test Vial and interpret the results.
Lead Test – Interpreting the Results

Bacteria Test – Step by Step Instructions
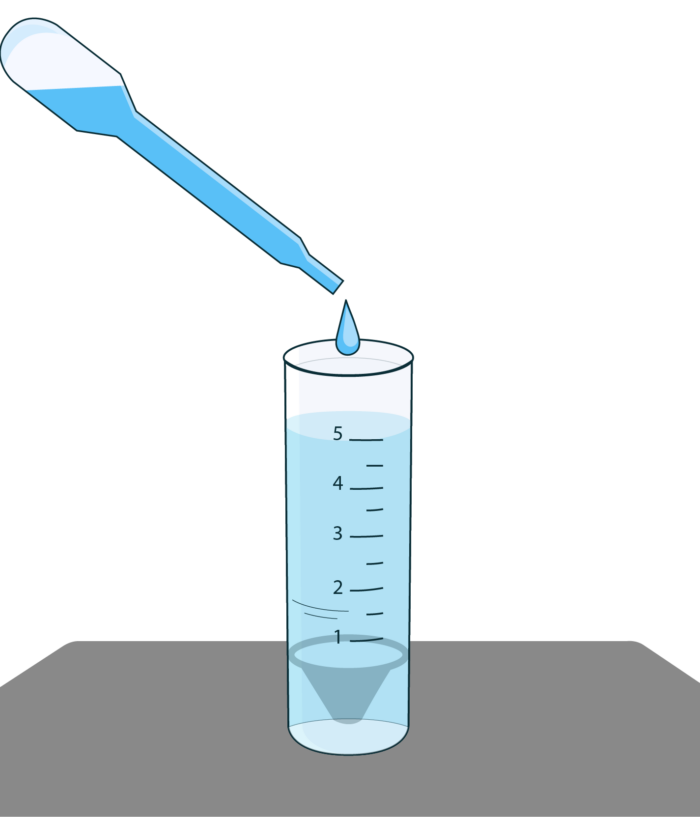
Step # 1
Carefully twist off cap and fill vial to 1/2 inch below the top (to 5 mL line).
DO NOT OVERFILL and DO NOT SPILL the bacterial growth powder in the vial.
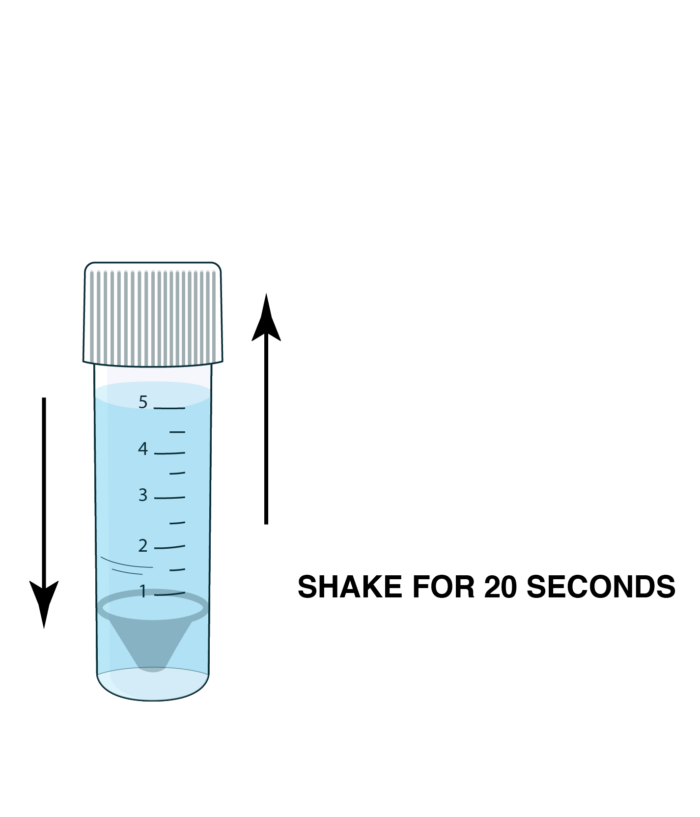
Step # 2
Replace the cap and twist on tightly.
Shake the vial vigorously for 20 seconds.
Step # 3
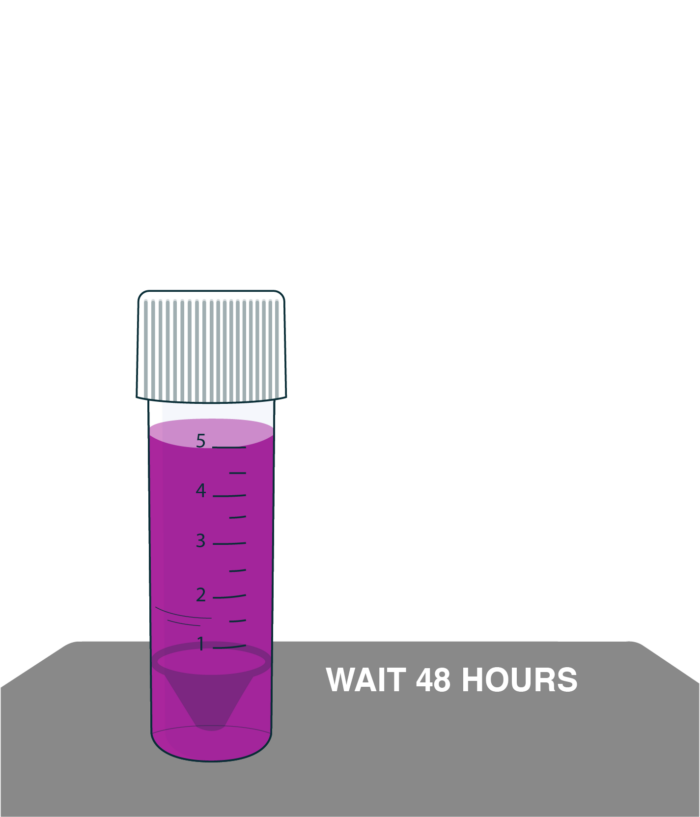
Place the capped vial upright in a warm area (70-90°F) where it cannot be disturbed for 48 hrs.
Step # 4
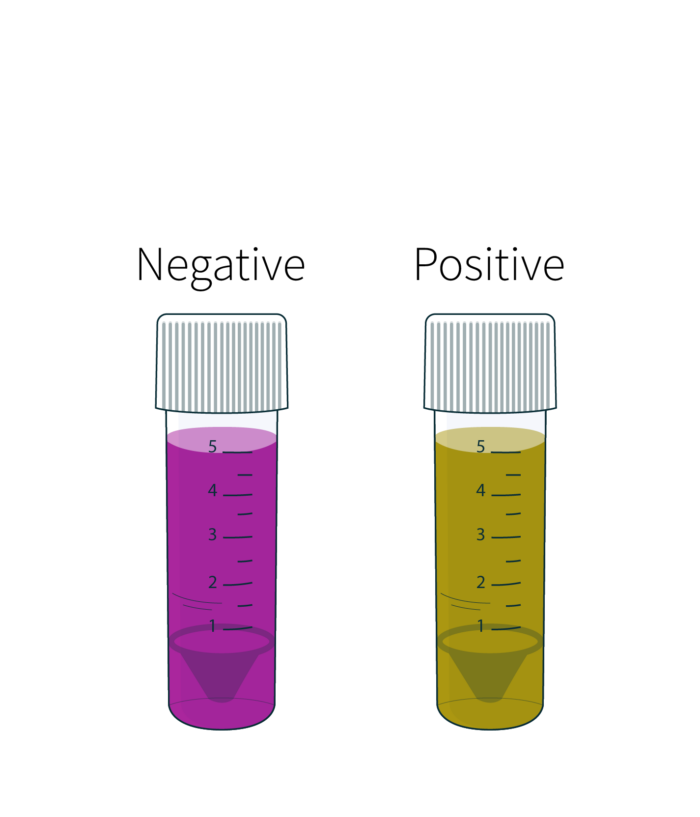
After 48 hrs. observe the color of the liquid without opening the vial:
Purple Color: Negative Result (No bacteria were detected)
Yellow Color: Positive Result (It is highly likely that potentially harmful bacteria were detected)